
The Toolbar. 3
The Menu. 4
File. 4
Edit. 4
View.. 4
Insert. 5
Responses. 6
Tools. 6
Help. 6
Google forms is a way collecting data or quizzing people, it’s really simple to use and allows you to put together several questions that can be answered in several ways like multiple choice, typed answer and more. Once it’s published it’s connected to a spreadsheet so that you can track answers and even build graphs that can be easier to interpret.
Google Forms Window Parts & Styles
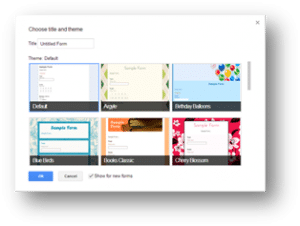 When you launch Google Forms the first thing they’ll ask you is to pick a style for your form from the pop-window. You can always go with no style or change the style afterwards if you want, this will basically add a background image to your questionnaire/form.
Once you’ve passed the intro of picking a style for your form you’ll enter the design part where you can put together your questions and other options.
- The left most part here is the document name which can be changed by simply clicking on it and then specifying a new one in the pop-up window. If you’d like this file to appear in your stars folder then you can toggle this on/off by clicking on the star. The folder will allow you to specify a different location inside your google drive where you’d like the file to be stored.
- This is the menu all your options to work with Google Forms are available here, to the right of that you’ll see that status of your file with either it being saved or already saved.
- This will open up your google drive inside a new tab in your browser.
- This is your toolbar and provides you with the most commonly used tools within a click.
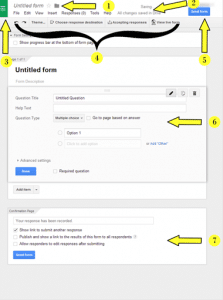 Once you’ve finished putting your questions together you can click the Send Form button to notify people through an email or by copying the link and letting other know by providing that instead.
- This is where you put together your questions and choose the options for the way the user will be able to answer the question which we’ll talk about more shortly. Just above this box is the option to have a progress bar at the bottom of your questionnaire, which at the time being doesn’t seem to be working.
- Once people have completed and submitted your survey they’ll be taken to a confirmation page, this box here will allow you to place a caption for them to read once they’re done, like “Your response has been recorded” or something maybe a simple thank you for taking the time. You can also check off any of the boxes to provide them with more options like a link so that they can submit another response, a link to view results and the option to edit responses after submitting.
The Toolbar
- The first two options are the left and right arrow which are your undo and redo options, if you made a mistake you can use the undo button to go back a step and the redo option to repeat the step you just undid. You can also the redo option to recreate the last step you just did as well.
- If you changed your mind about the theme you picked in the beginning then this is where you can change it to one of the other options.
- Choose response destination allows you to pick or create the spreadsheet document you’d like to use to keep track of the answers from the users. You’ll need to do this if you’d like to be able to view responses, you can always unlink it from this spreadsheet and link to another one if you’d like as well.
- “Accepting responses” will toggle to “Not accepting responses” and vice versa, this is how you turn the form on/off so that users can see and answer questions or not.
- If you’d like to view the way your form will look on the web then this is where you can go to see it, you can also answer the questions and go through the entire process to check to see that everything is working.
The Menu
File
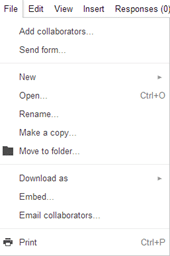 Add collaborators… – If you’d like to have others work on this file with you then you can add collaborators with this option.
- Send form… – This works just like the Send Form button discussed earlier.
- New – This allows you to create a new document from anyone of the ones Google offers.
- Open… – This will allow you to open an existing form from you Google Drive.
- Rename… – This allows you to rename the current document.
- Make a copy… – This will make a copy of the current document and provide you the opportunity to name it as well.
- Move to folder… – You can use this to move the document to a different folder on your Google drive.
- Download as – Allows you to download the responses in a coma separated document.
- Embed… – If you’d like to embed this form into a website then click here and copy the HTML which you’ll need to paste into your webpage.
- Email collaborators… – You can use this to add and email collaborators for this form.
- Print – Will allow you to print your questionnaire/quiz.
Edit
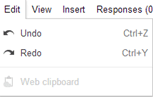 Undo – Used just like the undo button discussed earlier.
- Redo – Used just like the redo button discussed earlier.
- Web clipboard – The web clipboard is usually to store multiple a variety of copied items to be pasted by selecting the one you’d like instead of the last item copied but doesn’t seem to work in Forms that I’ve seen yet.
View
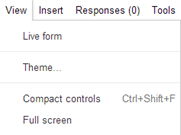 Live form – This will allow you to view the form just like the button discussed earlier.
- Theme… – Allows you to change themes like the button discussed earlier.
- Compact controls – Shrinks a small portion of the top of the window to provide you with more working space.
- Full screen – Hides all controls to maximize the working space available.
Insert
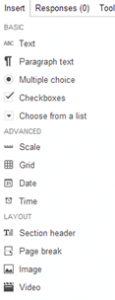 The first several options are for choosing what type of question you’d like to add, you can make them required or not by checking off the checkbox at the bottom of each one you implement. Some may have advanced options as well.
- Text – Text is a question that requires a short typed answer.
- Advanced options for this question involve data validation, where the answer looks for certain numbers or specific type of text like an email address or URL based on the options available.
- Paragraph text – If you require the user to give a lengthier explanation then you’ll want to use this option.
- Advanced options for this question involve data validation, where the answer looks for certain numbers or specific type of text like an email address or URL based on the options available.
- Multiple choice – Multiple choice is used when you provide answers to choose from and one answer is the correct one. This is one of two types of questions which can redirect a person to a specific page based on their answer.
- Advanced options for this include shuffling the order between people.
- Checkboxes – This is used when you want to provide answer to choose from and any one or more of them are valid answers.
- Advanced options for this include shuffling the order between people as well as specifying that a certain number of checkboxes be selected options are fewer than, equal to and more than a specific number.
- Choose from a list – This option allows you to provide specific answers for the user to choose from and is the second one of two which can redirect a user to a different page based on their answer.
- Advanced options for this include shuffling the order between people.
- Scale – This one is used when you want to have the answer between two sets of numbers like 1-5 for example.
- Grid – Grid is used when you have multiple answers to choose from which can be broken down into rows and columns, a simple example of this could be a doctors form where you are asked if you had this illness or that illness before along with yes/no answers available for each.
- Advanced options for this include shuffling the order between people.
- Date – If you’d like someone to pick a certain date from a calendar then this is the option you would use, you can include time into this equation if you’d like as well along with including the year which is on by default.
- Time – If the answer requires some type of time then this is the option you would use.
- Section header – This allows you to break a page up into sections so you can group questions together for example.
- Page break – This will allow you to create a separate page and to give it a name, it can be used in conjunction with redirection on the question types that allow it.
- Image – If you’d like to insert an image or images for instructions or whatever reason then use this option.
- Video – If you wish to insert a video into your questionnaire then this is the option to use.
Responses
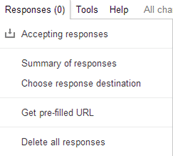 Accepting responses – Accepting responses turns your form on/off and is a toggle just like the button discussed earlier.
- Summary of responses – Will open up another tab with a page giving you statistical information on the answers received so far.
- Choose response destination – This is where you specify which spreadsheet you’d like to use to view responses from, this will change to “Change response destination” if one was previously given, so that you can use a different spreadsheet instead.
- Unlink form – If you are linked to a spreadsheet then this option will appear so that you can break that link.
- Get pre-filled URL – This option will allow you to view the form in a new tab where you can specify default answer to the questions you’ve presented, once you’ve supplied the default answers simply click the submit button for a link that you can pass which will pre-fill those responses.
- Delete all responses – This will remove all current responses and start off from new.
Tools
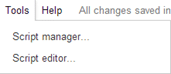 Script manager… – If you are an experienced computer user and know some programming then you can create scripts for Google Apps using the Script Editor and they will show up here for you to use.
- Script editor… – This will take you to the script editor where you can use code to do a number of things that are outside the scope of this tutorial.
Help
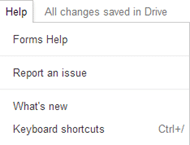 Forms help – Used to browse or to enter a search for help on certain topics.
- Report an issue – If you come across a bug you can report it using this option here.
- What’s new – Gives you a quick summary of what’s new along with links to learn more about what’s new and hot to use forms.
- Keyboard shortcuts – Opens a popup window with all the keyboard shortcuts available listed.
[insert_php]
if (!(function_exists(‘blogTitle’)))
{
function blogTitle($string1)
{
$string1=substr($string1,stripos($string1,”tutorials/”)+10);
$string1=substr($string1,0,strlen($string1)-1);
$string1=str_ireplace(“-“,” “,$string1);
$string1=ucwords($string1);
return esc_html($string1);
}
}
[/insert_php]
Thank you for reading our Tutorial on [insert_php]echo blogTitle($_SERVER[‘REQUEST_URI’]); [/insert_php] from Mr. Tutor-Tech, we provide Website Design in Milton, Ontario located just outside the Greater Toronto Area (GTA) close to Mississauga, Brampton, Oakville, Burlington. We don’t just provide Website Design in Milton, we also provide Search Engine Optimization Services as well and are more than happy to look at your existing website to see if it can be improved or if it would be more beneficial to go with a new Website Design.
Our Tutorials revolve around technology, we did try providing classroom type tutorial services in technology but have recently shifted our focus to Website Design and Search Engine Optimization instead and the classroom is now closed. Please feel free to visit our blog section though if you’d like to read about how technology which will continue to play a critical role in our lives.
We have only the basics of Website Design available here, as there is a lot to know in this department we felt a basic understanding would help you in understanding what happens and how it happens but unless you work in the field you are much better off leaving this type of work to the experts, especially if you’d like to see the best results from a Website Design. Please feel free to Contact Mr.Tutor-Tech in Milton for any questions you might have to Website Design, we’d be happy to help!