
The Toolbar. 3
The Menu. 5
File. 5
Edit. 6
View.. 6
Insert. 7
Slide. 7
Format. 8
Arrange. 9
Tools. 9
Table. 10
Help. 10
Google Presentation is a slide based presentation program very similar to other programs like PowerPoint. Using the program you can use images combined with text to bring emphasis to points and by using a mouse or some other input device you can advance slides to continue emphasising main points of a speakers presentation. Obviously there are a number of other uses for it as well like step by step instructions.
Google Presentation Window Parts
- This is the name of your document which you can change by clicking on it then typing in the new name. Beside it is a star which when clicked will toggle between on/off and when it’s on you’ll be able to find this document inside your starred folder shortcut. The folder beside that when clicked allows you to move the document to a different location that you specify.
- The menu contains all the functions available to you inside of Google Presentation, just beside that you’ll see if your document was saved already or is being saved.
- This is a shortcut to open up your Google Drive in a separate tab.
- These are the different slide/pages inside of your presentation and can be used to navigate between them.
- This is your toolbar and contains most of the important tools available inside of the menu.
- When you’re ready to present your slideshow or just want to see what it looks like while working on it you can use this button which also has a few option through its dropdown menu. They include present from beginning, present with speaker notes (will be displayed in a separate window) and present in new window.
- Want to leave comments that won’t show up in the presentation for yourself or for others working on the file with you then you can use this button to do so.
- If you want to share the presentation with others you can do so by pressing this button, then you have the option of sending out emails to them or by copying the link and sending it to those you want to see it.
- This will minimize the top part of the application up to the toolbar giving you more space to work with.
- This is the current slide which you are working on, you can write text, add images, change themes etc.
- These are notes for the speaker which you can be used while playing the presentation for the presenter to read from.
The Toolbar
The toolbar provides most of the common tools used within a single click, move from left to right we have:
- The new slide button which will create a new slide, a title slide by default and the last slide created after that. Using the dropdown arrows beside it will give you a few options to choose from for creating new slides.
- The next two options are the left and right arrow which are your undo and redo options, if you made a mistake you can use the undo button to go back a step and the redo option to repeat the step you just undid. You can also the redo option to recreate the last step you just did as well.
- When applying formatting to your document like bold or colour, you might like to add the same type of formatting from one part of your document to other parts. You can use the Paint Format tool for this, by placing your cursor in the text that’s formatting you’d like to copy and pressing the button you’ll then be able to drag your cursor over other text applying the same formatting to it. By clicking on the button once you’ll be able to copy over the formatting just once but by double clicking on it you’ll be able to continue to apply the formatting to any part of your document repeatedly, if you double clicked it then you’ll need to click it again to turn it off otherwise it will turn off on its own after you pasted the formatting with the one click option.
- The next two buttons are here for us to zoom in and out of our active slide, the first button might be greyed out but once you zoom in or out it will become active allowing you quickly to zoom to fit the slide. The magnifying glass will allow you to zoom in with the left mouse button and zoom out with the right mouse button. You can also hold down the left mouse button and drag a box around the area you’d like to zoom in on.
- The arrow button allows our mouse pointer to grab items on the slide and while holding down the left button drag them to different locations, or just by selecting the item we can modify or delete them as well. We can also select multiple objects by dragging a box over each of the items we’d like to select or by simply using the shift key and clicking on each one of the items. You can also deselect objects while holding down the shift key and then clicking on the object as well.
- The next button is for creating text boxes, once selected you can place your cursor anywhere on the slide and then either just click and start typing or while holding down the left mouse button drag a box to the desired width and height and start typing then so that the text will be confined to the width boundaries.
- This is the shape button, by clicking it you’ll receive a dropdown menu with sub-menus where you can choose a number of shapes from. Once you’ve selected the shape you’d like you can take your mouse over to the main slide and by holding down the left mouse button create your shape by dragging out the width and height to the desired dimensions.
- The line button by default will allow you to draw a straight line inside your document, the dropdown arrow will present you with a number of other options like curved lines, arrows and scribbles etc. the last tool used will show up on the button so that you can easily use it again with a single click.
- This is another comments button works just like the other one we described earlier.
- The Background… button allows us to specify images or colours we’d like to use for our background.
- The Layout button will present us with a dropdown menu for us to choose from a few different standard layouts, this will adjust the text on your screen to accommodate the layout.
- The Theme… Button allows us to choose between several themes which are designed to help us give beautiful presentations from pre-styled backgrounds, images and font formatting. You can always start off with a theme and adjust it the things you don’t like or just start from scratch the option is yours. When you first start Google Presentation you’ll be prompted to choose from one of these themes.
- The Transition… button opens up a pane to the right that allows us to pick from a few different types of transitions which are used in between slides, they allow us to add some fanciness to our presentation so that slides look like they’ve faded in or have entered from the left. Besides choosing the type of transition here you can also choose the speed at which they happen and if you’d like to have them apply to all slides. You can also sample or preview them by pressing the play button just below. This same pane can be used to apply animations to objects inside of the slide itself, these are like transitions for the different objects present in the slide itself. So you could have certain text for example fade in on the click of the mouse button. You can remove the animations by clicking the x button located on each one you make and for a transition you simply switch the transition to no transition.
The Menu
File
 Share… – This option is like the button we discussed earlier.
- New – Will give you a submenu from where you can choose to open up a new Google app file.
- Open… – Allows you to open other presentation files from your Google drive.
- Rename… – Allows you to rename the present document.
- Make a copy… – Makes a copy of the present document and allows you to specify a new name.
- Move to folder… – Moves the current document to a different folder that you specify.
- Import slides… – Allows you import slides from another presentation, first choose the presentation and then click select from there you’ll be asked to choose the slides to import.
- See revision history – Will present a pane to the right giving details on the current file.
- Language – Allows you to specify the default language you are using, this mainly applies to the dictionary.
- Download as – Allows you to save the current file to your computer with the file type you specify.
- Publish to the web… – This will publish the document to the web making it visible to anyone that has or can find the address.
- Email collaborators… – Allows you to email the address of the file to users who you might want to work on the document with you.
- Email as attachment… – Opens a window where you can enter email addresses, a subject line and email body. The file is automatically attached to this email.
- Page setup… – Allows you to specify the size of the presentation from a number of pre-sets or by using custom settings.
- Print settings and preview – Slightly different then the print option which is next, this gives you a few other options of how you would like to print your document.
- Print – This is your standard way of printing a document.
Edit
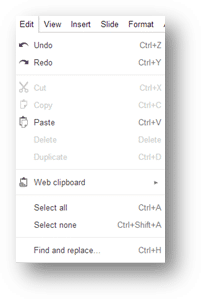 Undo – Will undo the last change and the one before it with each additional click.
- Redo – Will redo any last changes that were undone or redo the last change you made if undo wasn’t used.
- Cut – Removes the selection and places it into memory.
- Copy – Leaves the selection and places a copy of it into memory.
- Paste – Pastes the selection that’s available in memory.
- Delete – Deletes the current selection
- Duplicate – Will copy and paste the current selection.
- Web clipboard – Allows you to copy multiple items to the clipboard for the ability to pick what you’d like to paste from a list.
- Select all – Selects everything inside of the current slide.
- Select none – Deselects everything inside of the current slide.
- Find and replace… – Allows you to search for certain text inside of the current slide or to replace it with something else if you specify and choose to do so.
View
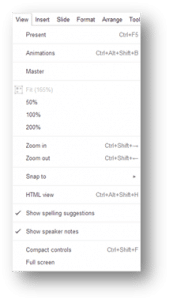 Present – Will display the current slide in presentation mode.
- Animations – Will open the transition/animation pane to the right.
- Master – Will open up a window where you can edit, delete and create default slides which you can quickly add to your presentation later using the add slide button located to the left on the toolbar.
- Zoom – There are several pre-set zoom options to choose from along with being able to zoom in/out.
- Snap to – Makes aligning objects easier by either having the snap to gridlines or guidelines, neither of which I can find at the time of writing this.
- HTML view – Will display your entire presentation as if it was all on one web page, making it easy to export for the web.
- Show spelling suggestions – Toggles auto-spell checking which will place a red line under any words Google thinks has the wrong spelling.
- Show speaker notes – Will toggle on/off the speaker notes at the bottom.
- Compact controls – Will minimize the controls at the top and works like the button discussed earlier.
- Full screen – Will hide all menus and toolbars at the top maximizing your work area.
Insert
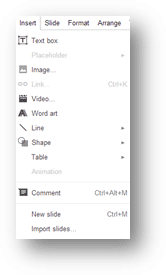 Text box – Allows you to place text on your slide as discussed earlier.
- Placeholder – When in master view allows you to insert place holders for title, sub-title or body inside the slide.
- Image… – Allows you to pick an image to insert into your slide.
- Link… – Changes selected text to a hyperlink.
- Video… – Allows you to insert a video into your slide.
- Word art – Will give you a popup box where you can type a word into once you’re done press enter. The word will appear across the middle of your slide. The difference between word art and regular text is that word art has two colours you can change which is the outline and the fill. You can also change the thickness of the outline along with its pattern from a solid line to dotted for example.
- Line – Is the same as the line button discussed earlier.
- Shape – Is the same as the shape button discussed earlier.
- Table – Allows you to create a table of specified rows and columns, will be discussed more under the table menu option.
- Animation – Is the same as the transition button discussed earlier.
- Comment – Is the same as the comment button discussed earlier.
- New slide –Inserts a new blank slide.
- Import slides… – Allows you to import slide the same as the one found under file.
Slide
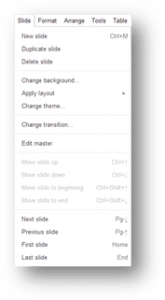 New slide – Inserts a new blank slide.
- Duplicate slide – Will copy and paste the current slide.
- Delete slide – Removes the current slide.
- Change background… – Same as the background button discussed earlier.
- Apply layout – Same as the layout button discussed earlier.
- Change theme… – Same as the theme button discussed earlier.
- Change transition… – Same as the transition button discussed earlier.
- Edit master – Same as the master under the view menu.
- Move slide up – Will move the current slide up one level.
- Move slide down – Will move the current slide down one level.
- Move slide to beginning – Moves the current slide all the way up to the top.
- Move slide to end – Moves the current slide all the way to the bottom.
- Next slide – Takes you to the next slide in your presentation.
- Previous slide – Takes you to the previous slide in your presentation.
- First slide – Takes you to the first slide in your presentation.
- Last slide – Takes you to the last slide in your presenation.
Format
 Bold – Makes the selected text bold or just turns bold on if nothing is selected for the text you are about to type.
- Italic – Makes the selected text italics or just turns italics on if nothing is selected for the text you are about to type.
- Underline – Makes the selected text underlined or just turns underline on if nothing is selected for the text you are about to type.
- Strikethrough – Makes the selected text strikethrough or just turns strikethrough on if nothing is selected for the text you are about to type.
- Superscript – Makes the selected text superscript or just turns superscript on if nothing is selected for the text you are about to type.
- Subscript – Makes the selected text subscript or just turns subscript on if nothing is selected for the text you are about to type.
- Paragraph styles – Gives you options to indent or remove indents from typed text or text you are about to type.
- Align – Allows you to choose from both vertical and horizontal text options.
- Line spacing – Allows you to increase/decrease the line space between text.
- Bulleted list – Presents options on different types of bullets for creating a list.
- Numbered list – Presents options with different types of numbers for lists including sub-levels.
- List options – Changes the options for numbered lists, you can use it on main or sub-levels.
- Clear formatting – Removes any formatting from text but leaves the text.
- Change shape – If a shape is selected this option will allow you to pick a different one.
- Line weight – Changes the thickness of the outline of the selection.
- Line dash – Changes the type of line from solid to any of the selections like dashed.
- Line decorations – Gives you a selection to change the way outlines meet and intersect from square to round for example.
- Arrowhead size – Changes the size of the arrow head on arrows created with the line tool not the shape tool.
- Crop image – With an image selected this tool will allow you to remove portions of it that you might not want.
- Alt text… – Allows you to specify alternative text which is text that can read by reading machines or displayed in browsers.
Arrange
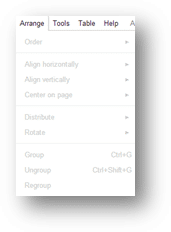 Order – When working with multiple objects on a slide you might want some of them to appear above others, this is how you can control that by moving them forward, back, to front or back.
- Align horizontally – With multiple objects selected you can have them both aligned left, center or right of each other.
- Align vertically – With multiple objects selected you can have them both aligned to the top, middle or bottom of each other.
- Center on page – Will allow you to center the object either horizontally or vertically based on your choice.
- Distribute – This works with at least 3 objects selected and will space them out equally either vertically or horizontally based on your choice.
- Rotate – This option will allow you to rotate the object by 90 degrees or flip it vertically/horizontally.
- Group – Allows you to combine multiple objects so that they behave as one.
- Ungroup – Will ungroup combined objects so that you can address the individually again.
- Regroup – When one object has been grouped and is selected you can use the regroup object to recombine it with the object it was grouped with originally without selecting that other object.
Tools
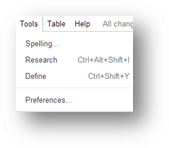 Spelling… – This will scan your document for spelling mistakes and give you options on ones that it found that could be wrong.
- Research – This will search the internet for the selected text or what you type in.
- Define – This will search the internet for a dictionary definition of the selected text what you type in.
- Preferences… – Allows you to turn on/off smart quotes, automatically detect links and automatic substitution whose list of characters to substitute are followed in the list.
Table
 Insert table – This option allows you to insert a table by specifying the number of rows and columns.
- Insert row above – When working inside of the table this will allow you to insert a row above the current location.
- Insert row below – When working inside of the table this will allow you to insert a row below the current location.
- Insert column left – When working inside of the table this will allow you to insert a column to the left of the current location.
- Insert column right – When working inside of the table this will allow you to insert a column to the right of the current location.
- Delete row – This will delete the row of the current location.
- Delete column – This will delete the column of the current location.
- Distribute row – This will make all the rows equal height.
- Distribute columns – This will make all the columns equal width.
- Merge cells – This will combine cells when there are multiple ones selected.
- Unmerge cells – When cells are combined this will split them up again.
Help
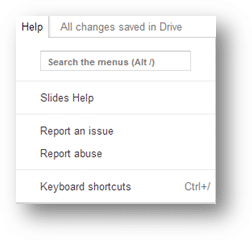 Slides Help – If you’re looking for help with Google sheets then this is where you can find it either by typing a word into the search or by browsing through the links.
- Report an issue – If you are experiencing problems you can report them using this option.
- Report abuse – You can report abusive behaviour using this option.
- Keyboard shortcuts – This option will allow you to view a list of available keyboard shortcuts.
[insert_php]
if (!(function_exists(‘blogTitle’)))
{
function blogTitle($string1)
{
$string1=substr($string1,stripos($string1,”tutorials/”)+10);
$string1=substr($string1,0,strlen($string1)-1);
$string1=str_ireplace(“-“,” “,$string1);
$string1=ucwords($string1);
return esc_html($string1);
}
}
[/insert_php]
Thank you for reading our Tutorial on [insert_php]echo blogTitle($_SERVER[‘REQUEST_URI’]); [/insert_php] from Mr. Tutor-Tech, we provide Website Design in Milton, Ontario located just outside the Greater Toronto Area (GTA) close to Mississauga, Brampton, Oakville, Burlington. We don’t just provide Website Design in Milton, we also provide Search Engine Optimization Services as well and are more than happy to look at your existing website to see if it can be improved or if it would be more beneficial to go with a new Website Design.
Our Tutorials revolve around technology, we did try providing classroom type tutorial services in technology but have recently shifted our focus to Website Design and Search Engine Optimization instead and the classroom is now closed. Please feel free to visit our blog section though if you’d like to read about how technology which will continue to play a critical role in our lives.
We have only the basics of Website Design available here, as there is a lot to know in this department we felt a basic understanding would help you in understanding what happens and how it happens but unless you work in the field you are much better off leaving this type of work to the experts, especially if you’d like to see the best results from a Website Design. Please feel free to Contact Mr.Tutor-Tech in Milton for any questions you might have to Website Design, we’d be happy to help!