
Quick Access Toolbar. 3
Notebooks. 4
Tabs. 4
Containers. 4
Extended Pages. 4
Backstage. 4
Home Tab. 4
Clipboard Group. 4
Basic Text Group. 5
Styles Group. 5
Tags Group. 5
Outlook Group. 5
Insert Tab. 5
Insert Group. 5
Tables Group. 5
Table Tools – Layout Tab. 5
Select Group. 5
Delete Group. 6
Insert Group. 6
Borders Group. 6
Alignment Group. 6
Images Group. 6
Links Group. 6
Files Group. 6
Recording Group. 6
Time Stamp Group. 6
Symbols Group. 6
Share Tab. 7
E-mail Group. 7
Unread Group. 7
Shared Notebook Group. 7
History Group. 7
Draw Tab. 7
Tools Group. 7
Insert Shapes Group. 8
Edit Group. 8
Convert Group. 8
Review Tab. 8
Spelling Group. 8
Language Group. 8
Notes Group. 8
View Tab. 9
Views Group. 9
Authors Group. 9
Page Setup Group. 9
Zoom Group. 9
Window Group. 9
Revisions 2016. 10
OneNote is a part of the Microsoft Office Suite and is now also being offered for free. It is a useful tool to help keep a scrapbook of notes and other types of media that can easily be shared or collaborated on by others. You can easily pull information off the internet and send it to OneNote as well through a button that will be available to you on the navigation bar in Internet Explorer or if you prefer some other browser possibly through some third party add-on. You can also make it available on the internet so you can sync it with other devices like your mobile phone for example and always have access to it along with updating it on the road.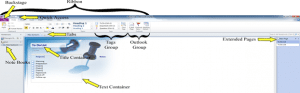
The Ribbon
With the introduction of Office 2007 came the ribbon which is at the top of the window, making it convenient for users to easily select the tool they need within a couple of clicks of the mouse or keyboard especially if you are a shortcut person like me. Just above the ribbon is the quick access toolbar and both are customizable should you want to add functions to them. Introduced in 2010 is the backstage which basically was the Microsoft Office Button in 2007. Each of the tabs in a ribbon is broken up into individual groups which you are separated by a horizontal bar, the group name appears at the bottom like Tags Group or Outlook Group.
Quick Access Toolbar
If you find yourself using certain tools often or wished some tools were located in other parts of the ribbon, then you can easily add them to the quick access bar. There a few ways of doing this, you can click on the arrow of the quick access bar and select from the options given there or through its dialog box which can be found by right clicking on the ribbon as mentioned above or by clicking on the quick access toolbar arrow and selecting more commands at the bottom of the list. From there you simply just add/remove the commands you’d like by finding the function from the left and either clicking on add or by double clicking it. You can also filter the functions by categories to make them easier to find. If you find yourself using a tool often you can also very easily right click on it and then add it to the quick access toolbar. Try not to over crowd the toolbar or it might not be as useful, remember if it becomes too crowded you can easily remove a command by right clicking it and selecting Remove from Quick Access Toolbar or use the dialog box in the reverse manner.
Notebooks
You can create new Notebooks easily through the backstage, OneNote gives you a pane on the left side of the window to allow you to quickly jump between them.
Tabs
Each of the Notebooks you create has tabs where you can organize your material in and label the tabs by a category.
Containers
You can create text/image containers easily just click anywhere and start typing and it will automatically be inserted for you, you can style these containers to however you’d like to task lists, to do list checkboxes, events etc. By default you’ll have a title container that will place the current date and time when you created the page.
Extended Pages
 Using Extended Pages you can easily create new pages within each tab to separate your work. There is also a drop down list here available to create different types of pages quickly and easily from existing templates like a To Do List.
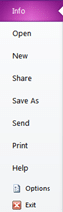
Backstage
Using the Backstage you gain access to more information about a particular Notebook, along with syncing it. Open other notebooks, create new ones, share the current one, save as a new name, send it to someone via email, print it, help and use options to change any of the many settings available to the application that are behind the scenes.
Home Tab
Clipboard Group
 The first group under the Home Tab is the Clipboard group where you can use the familiar tools of copy and paste which besides being found here are usually available with a right click and picking from the menu or the hopefully familiar shortcut keys of CTRL+, C for Copy, X for Cut and V for paste. Both Copy and Cut will take your selection and put it into memory so that a copy of it can be Pasted somewhere else the difference is Cut will remove the original where Copy leaves it alone. With the Paste dropdown menu you’ll be presented with a few different options depending on what you copied, these may include keep source formatting, apply destination formatting, keep text only or paste as an image. The one other tool available here is the Format Painter which will copy the current cursors location formatting and present you with a brush where you can paint it to other text to apply it too. By double clicking it you’ll leave the Painter on where as a single click is only for a single use.
Basic Text Group
 The Basic Text group is where you set the font type you’d like to use along with its size. You can start bullets here as well both unordered and ordered. Use the eraser to remove formatting from the text you have selected. Below that you have bold, italics, underline, strikethrough, subscript and superscript. The highlighter will allow you to change the background colour to one of the highlighting colours available and next to that you can
  change the colour of your text/font. The next two buttons control indenting by either removing it or inserting one and finally we have alignment options where you can use left, center or right justify, in the dropdown menu you have line height as well.
Styles Group
 The Styles group is a dropdown list where you can choose if you’d like to make the selected text a heading or add some other type of emphasise from the selection.
Tags Group
Under the Tags group you have options of inserting a number of objects some of which like the checkbox are interactive and have some type of function. The Find Tags button will open a pane to the right which will list all the different Tags in your document.
Outlook Group
 The Outlook group provides you with connectivity to Outlook to send an email of the page, add tasks which the two programs will display or to check for meetings in Outlooks calendar.
Insert Tab
Insert Group
The Insert group only contains the Insert Space button which you can use to increase the space between two containers should you need to extend or want to insert another one.
Tables Group
 The Tables group has on button as well and that’s to insert a table, which is a way to organize your content both vertically and horizontally with what’s known as columns and rows. Once the table is inserted you’ll receive a new tab on the ribbon to be able to apply some changes to it.
Table Tools – Layout Tab
Select Group
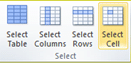 The Select group allows us to easily select the entire table, a column(s)/row(s) and just the individual cell itself.
Delete Group
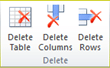 You can easily delete tables, columns or rows by selecting them and then pushing one of these buttons which corresponds to your action.
Insert Group
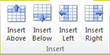 The Insert group is just the opposite of the Delete group here you can insert rows or columns above, below, left or right of the current cursor location inside of the table.
Borders Group
 This group only has one option and that’s to hide or show borders this button acts like a toggle so pushing it each time will do the opposite of what’s currently being done.
Alignment Group
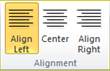 The last group is Alignment and it allows us to put the text in the cell(s) selected to the left, center or right.
Images Group
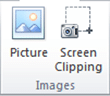 With the Images group we can insert a picture in one of two ways by either inserting a picture from a file or by taking a screen shot, the screen shot will cause any or all of your monitors to have a white fill by using the mouse you can draw out a box to select what portion of it you’d like to copy which will automatically be placed into your current page in the notebook.
Links Group
 The Link button in this group allows you to enter a web address to some text so when you click on it, it’ll take your browser to that location.
Files Group
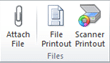 The Files group allows you attach files so that you can have a shortcut to that file inside of your document, you can also insert your file as if it was a printed out version as well. If you have a scanner connected then you can use the Scanner Printout button to capture an image from it.
Recording Group
 If you have a microphone or a video camera you can use the record buttons to capture either the audio or video, depending on what you’d like to do obviously.
Time Stamp Group
 If you’d like to quickly add a date, time or both date & time these three buttons are here for you to do so.
Symbols Group
 The last group on this tab is equations and symbols which are used to insert mathematical equations or special symbols not found on the keyboard.
Share Tab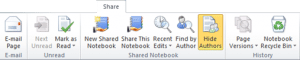
E-mail Group
 This button here behaves just like the one on the Home tab and will put your current page in an Outlook email ready to be sent.
Unread Group
 Using the OneNote button inside of Outlook you can send email from Outlook to OneNote, if there are more than one unread one’s you’ll be able to use the Next Unread button or change the way they were marked to either read or unread.
Shared Notebook Group
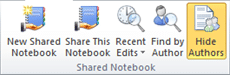 With the Shared Notebook group you have a few options, you can create a New Shared Notebook or Share This Notebook so others can use it as well, all you have to do is specify where like the web or local network. With the Recent Edits dropdown menu you can select from several timing choices on what changes OneNote should highlight for you from Today to the Last 6 Months, you can also organize the pages by date here as well. Find by Authors will open a pane to the right listing the authors that worked on the document and you can use it to jump to their work. If you have multiple users working on the document you can choose whether or not you want OneNote to display that information beside their work by toggling the Hide Authors button on/off.
History Group
 OneNote will keep track of changes you make unless you disable it from the dropdown menu on the Page Versions button. You can also use this button to view versions and even delete the ones you won’t need any more as well. There’s also a chance that something you deleted ended up in its recycling bin which you can use the button to check or even empty it.
Draw Tab
Tools Group

The Tools group allows you to select objects using the Select & Type or the Lasso Select button, using the Eraser you can remove parts of it. The Panning Hand button will allow you to hold down the left mouse button and drag your page up/down and left/right to get to another part of it (document needs to be zoomed in and bigger than your current window size for this to work). Using a choice from a number of pencils and colours you can use a pencil to draw stuff by freehand or even highlight stuff as well.
Insert Shapes Group
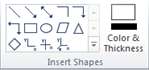 You can easily pick from a number of available shapes and then draw them to size from the Insert Shapes group, simply pick the shape you want and hold down the left mouse button to drag it out to what size you want. Using the Color & Thickness button you can specify how you want the outlines to look.
Edit Group
 With the edit group you have the option to Insert Space again, you can delete your selection or Arrange it by making one object sit in front or behind another one called a stacking order. You also have the option to Rotate it here as well which goes by 45 or 90 degrees at a time or can flip it horizontally or vertically as well.
Convert Group
 There are devices you can use so that you can handwrite right into your document, should you want to convert it to text or even math equations that can be read by the computer you’d do that here with either the Ink to Text or Ink to Math button.
Review Tab
Spelling Group
Under the Review tab you’ll find the Spelling group pretty useful to double check your spelling and grammar and also to look up words to find out what they mean using the Research button.
Language Group
Using the Language group you can Translate from one language to another using the two buttons here you’ll have the option to choose what languages to translate to and what dictionary or language to use for the things you’re working on as well.
Notes Group
The Notes group contains the Linked Notes button which you’ll find throughout other Office products as well, it’s a way of inserting the information you are working on or looking at and putting it either inside of a notebook directly or have a link back to it.
View Tab
Views Group
 With the Views group you can switch between two views Normal and Full Page which will hide all the extra panes with it. By pressing the Dock to Desktop button OneNote will fix itself inside of a window causing others to shrink so that it won’t touch its real estate.
Authors Group
 The Authors group allows us toggle the Hide Authors button which is the same as it was in the Share tab.
Page Setup Group
 In the Page Setup group you can change the Page Color of your notebook, you can make it resemble lined or graph paper using the Rule Lines dropdown menu and you can also use Hide Page Title to remove the title, date & time attached by default to each page you create. Your last option is to change the size of the paper you’d like your documents to use.
Zoom Group
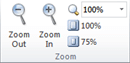 With the Zoom group you can Zoom In/Out with the first two buttons or you can write or pick from a dropdown list of common settings which include two buttons just below that are set at 100 and 75 percent.
Window Group
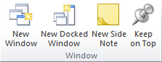 With the Window group you can open a New Window or a New Docked Window. The New Side Note button will open up a sticky note type of window where you can put notes in, after closing this window you can find the notes in the bottom left of the OneNote window where it says Unfiled Notes and then you’ll be able to choose from the pane on the right. Keep on Top is useful if you’d like to keep OneNote on the top and have other windows fall behind it.
Revisions 2016
 Between 2010 and the 2016 version of OneNote nothing has really changed except where you can find and use some of the tools.
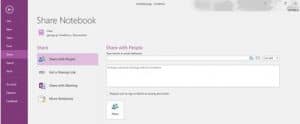
The Share Tab has been removed and replaced by the History Tab, which contains the same tools except sharing. This is now done solely through the Backstage. Here you can send users emails by entering email addresses and then specifying if they can edit or only view the book. You also have the option of forcing them to login.
The other way of sharing is by sending a link for either viewing or editing to the people by copying it and sending it through email or some other method. This also means anyone containing that link can gain access to that book as well.
 The other change is where you can create Page Templates is now in the Insert Tab in the Pages Group, once you click on the button you’ll have options presented to you in a drop down. Here you have the option of the last template you chose if you have along with simple lecture notes. If you click on page templates you’ll get a window pane to the side with categories you can expand to pick templates from.
[insert_php]
if (!(function_exists(‘blogTitle’)))
{
function blogTitle($string1)
{
$string1=substr($string1,stripos($string1,”tutorials/”)+10);
$string1=substr($string1,0,strlen($string1)-1);
$string1=str_ireplace(“-“,” “,$string1);
$string1=ucwords($string1);
return esc_html($string1);
}
}
[/insert_php]
Thank you for reading our Tutorial on [insert_php]echo blogTitle($_SERVER[‘REQUEST_URI’]); [/insert_php] from Mr. Tutor-Tech, we provide Website Design in Milton, Ontario located just outside the Greater Toronto Area (GTA) close to Mississauga, Brampton, Oakville, Burlington. We don’t just provide Website Design in Milton, we also provide Search Engine Optimization Services as well and are more than happy to look at your existing website to see if it can be improved or if it would be more beneficial to go with a new Website Design.
Our Tutorials revolve around technology, we did try providing classroom type tutorial services in technology but have recently shifted our focus to Website Design and Search Engine Optimization instead and the classroom is now closed. Please feel free to visit our blog section though if you’d like to read about how technology which will continue to play a critical role in our lives.
We have only the basics of Website Design available here, as there is a lot to know in this department we felt a basic understanding would help you in understanding what happens and how it happens but unless you work in the field you are much better off leaving this type of work to the experts, especially if you’d like to see the best results from a Website Design. Please feel free to Contact Mr.Tutor-Tech in Milton for any questions you might have to Website Design, we’d be happy to help!