
Quick Access Toolbar. 3
Window Parts. 4
Slides/Outline Pane. 4
Status Bar. 4
Slide Pane. 4
Notes Pane. 4
View Options. 4
Previous/Next Slide. 4
Scroll Bar. 4
Backstage. 5
Save. 5
Save As. 5
Open. 5
Close. 5
Info. 5
Recent. 5
New.. 5
Print. 5
Save & Send. 5
Help. 5
Options. 5
Exit. 5
Home. 6
Clipboard. 6
Slides. 6
Font. 6
Paragraph. 6
Drawing. 7
Editing. 7
Insert. 7
Tables. 7
Table Tools – Design. 7
Table Tools – Layout 8
Table. 8
Rows & Columns. 8
Merge. 8
Cell Size. 8
Alignment 8
Table Size. 9
Arrange. 9
Images. 9
Picture Tools – Format 9
Illustrations. 10
Links. 10
Text. 11
Symbols. 11
Equation Tools – Design. 11
Media. 11
PowerPoint is a slide/movie based presentation program that is part of the Office suite. It’s used to create either interactive slide presentations that respond to clicks of a mouse which advances to the next frame or can launch an animation on a particular frame. You can also record timing sequences so that this happens on a particular point in time instead of having to click the mouse as well. If you are familiar with some of the other Office products like Word then most of the tools here will be familiar to you there a few new tools other than that which you’ll want to know about.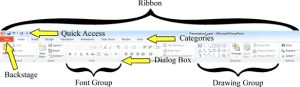
The Ribbon
Since the introduction of Office 2007 Microsoft has shifted from their usual menu type system to what’s called the Ribbon, this makes it easier to get to tools and is intended to reduce getting to a tool within two clicks. The first being on the tab and then on the tool you’d like within the group of that particular ribbon. Some groups contain more tools in a dialog box, you can reach the dialog box by clicking the arrow icon in the bottom right corner of a group that contains it.
Quick Access Toolbar
If you find yourself using certain tools often or wished some tools were located in other parts of the ribbon, then you can easily add them to the quick access bar. There a few of ways of doing this, you can click on the arrow of the quick access bar and select from the options given there or through its dialog box which can be found by right clicking on the ribbon as mentioned above or by clicking on the quick access toolbar arrow and selecting more commands at the bottom of the list. From there you simply just add/remove the commands you’d like by finding the function from the left and either clicking on add or by double clicking it. You can also filter the functions by categories to make them easier to find. If you find yourself using a tool often you can also very easily right click on it and then add it to the quick access toolbar. Try not to over crowd the toolbar or it might not be as useful, remember if it becomes too crowded you can easily remove a command by right clicking it and selecting Remove from Quick Access Toolbar or use the dialog box in the reverse manner.
Window Parts
Slides/Outline Pane
This is where you can see all the slides in your project and easily jump between them.
Status Bar
The status bar will tell you what page you are on out of the total pages, what theme you are using, if any spelling mistakes were found and the dictionary you are using.
Slide Pane
The slide pane is where you’ll construct and layout individual slides.
Notes Pane
You can add notes here for personal reference that won’t be part of your presentation, useful not only for yourself but if you are working on the project with others as well.
View Options
View options can be used to change the way you’re viewing your presentation by one slide or view multiple at once and also used to play your presentation as well.
Previous/Next Slide
Easily jump to the next or previous slide using these buttons
Scroll Bar
Used just like any other windows scroll bar to move through your project.
Backstage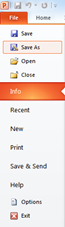
Save
Here is where you can save your existing document.
Save As
When saving a new document or just wanting to rename a document to something else you’ll want to use the Save As option, when saving your document for the first time the Save option will behave this way as well.
Open
When opening a document from inside of PowerPoint you use this option.
Close
To keep PowerPoint open and close a file use this option
Info
To get more information on a file use this option, you can also use it to set permission on who can change stuff, prepare for sharing or recover files that might have been auto-saved but not saved.
Recent
When working on documents they’ll be added to the recent tabs with the most recently used showing up first, you can also pin files there as well so that they’ll always be in that spot.
New
Typically when we create a new document its blank but we can use new to load other templates as well saving you time on design.
Print will allow you to see all your pages and what they would look like on paper along with choosing other print options like the printer and pages you’d like to print.
Save & Send
Along with saving this option provides you with the capability of automatically attaching it to an email.
Help
Having problems needs some help, this is where you’ll get it.
Options
There are many settings under options that let you control the way PowerPoint works under the hood.
Exit
Done with PowerPoint you can come here or just click on the X in the top right to close it.
Home
Clipboard
 You can cut, copy and paste in many different ways, using the right mouse button will give you menu options. You can use the familiar short cut keys of CTRL + X to cut, C to copy and V to paste or you can use this group under the Home tab as well. One other option available here is the Format Painter, this will copy the style of the text where your cursor is currently located once activated you can run the mouse over anything you’d like to apply that style too, by double clicking it you can leave it on and continue to drag your mouse over and over again more text until you’re done and then turn it off.
Slides
 You can use the slide section to create new slides, simply clicking the New Slide button will give you a new default slide or the last one you chose before, you can choose pre-designed or a blank one by selecting the drop down arrow. If you’d like to change the way the current slide looks you can do this by selecting one from the Layout drop list or if you’d like you can Reset it by clicking on that button. You can also group slides together in what’s called sections, this way you can apply or change styles to a group of slides at once. You can also remove sections and collapse/expand them as well to maximize the workspace in the Slides/Outline Pane.
Font
 Using the Font Group you can quickly change between fonts, you can change their size in a couple of ways by specifying or pressing the larger/smaller button. You can erase any formatting applied to the font. Bold, italicize, underline, shadow, strike through, character spacing, colour and even change what’s written to UPPERCASE, lowercase, Sentence case, Capitalize Each Word and toggle which will reverse what you have currently from lower to upper and vice versa.
Paragraph
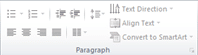 In the paragraph group we can add bullets to our text, increase/decrease indents, control line spacing, horizontal alignment (left, center, right, justified), columns, text direction, vertical alignment (top, middle, bottom) and convert to smart art.
Smart art is a graphical representation, it can be hierarchal, relationship, cycle or more. It’s called smart art because the art will adjust to what you type in. The more categories the smaller the art becomes to have it fit.
Drawing
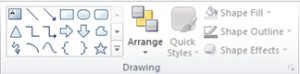 In the drawing section we have all kinds of shapes available we can draw out to what size we’d like, along with changing their fill, outline and other shape effects. There are also the quick styles to let us choose from a number of pre-sets. When working with multiple shapes we can also control the order in which they appear by bringing them forward or backwards in a stacking order? We can also group or ungroup these shapes together and even align or rotate them as well.
Editing
 Using the editing group we can find or even replace text inside of our presentation as well as select all or different parts of our presentation. You can also use the selection pane to show all the different objects in your presentation and use it to select the ones you want.
Insert
Tables
 Using the tables group you can create a table in a few different ways, you can use the boxes to select how many rows or columns you’d like, and by using insert table you can numerically specify this instead. You can also draw them using the pencil tool. These types of tables will also give you extra tools which we’ll talk about in a minute and you’re last option is to insert an Excel table which will use the toolbar for those familiar with excel instead.
Table Tools – Design
Table Style Options
Use the table style options to select to select which rows or columns will get highlighted
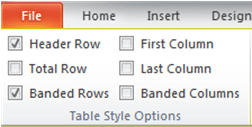 Header – Top row
- Total – Bottom row
- Banded – Every other row
- First – First column
- Last – Last column
- Banded – Every other column
Table Styles
 Table styles allows you to pick a certain colour arrangement from a number of different pre-set looks, you can also use shading, border and effects to give them a custom look.
WordArt Styles
 Use quick styles or choose custom settings for your text inside your table, there are a number of different effects you can choose from. You can control the fill, outline and other effects using the appropriate buttons but you can also start from a pre-set and change this as well.
Draw Borders
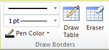 Using the draw borders group you can use the pencil tool to add borders to cells by selecting the border you’d like to change. You can change the type of border you got along with the thickness and colour as well. Use the draw table button or eraser button to add more tables or erase sections.
Table Tools – Layout
Table
 Using the table group you can use the select tool to select the current table, column or row.
Rows & Columns
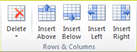 Using the delete drop down menu you can easily delete specific rows, columns or the entire table. You can also insert new rows or columns easily by using the next four buttons which will allow you to do it above/below or left/right from the current selection.
Merge
 When working with tables you can merge or split cells easily using this group. Simply highlight the cells you’d like to merge and click Merge Cells or select the cell you’d like to split and click Split Cells.
Cell Size
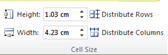 By selecting cell(s) you can easily adjust its column/row height/width by either entering a number for the units of measurement or by using the arrows to increase or decrease its value. You can also quickly make them all even by using the distribute rows/columns buttons as well.
Alignment
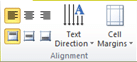 As you enter text in the cells you might want to align them in different ways you have several choices here left, center and right alignment along with top, middle or bottom. You can also have the text run in different directions by rotating it or having it stacked. The last option in this group is the margins or space you’d like to have between the text and the border inside your cells.
Table Size
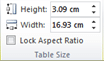 Along with cells you can also adjust the height and width of the entire table again by either entering in a numerical value or by using the arrows to increase or decrease its value. If you’d like to keep the height and width aspect ratio you can select the check box here so PowerPoint will do it for you automatically.
Arrange
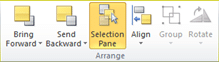 Using the arrange group you can choose the stacking order of your table by bringing it forward or back in relation with other objects in your PowerPoint presentation. By using the selection pane you can quickly see all the objects you have in your presentation and use it to select or go to the objects easily. Using the align drop down you can position the table quickly in your slide to several pre-sets like top, middle, bottom, left, center or right. There are even options here for a grid that can help you position objects accurately and you can control the size of your grid here as well to meet your need or specifications.
Images

 Using the images group you can insert a picture from a file on your computer. You can insert Clip Art using the pane to search for what you need from Microsoft’s online repository. You can use the Screenshot to capture images from your different windows. With the PhotoAlbum dropdown you can create new or edit other photoalbums you’ve made, to create a photoalbum is easy. Once you’ve clicked on the button you’ll presented with a dialog box asking you to locate and select the photo’s you’d like in the album, you can also apply styles and shapes here but you’re better off just
 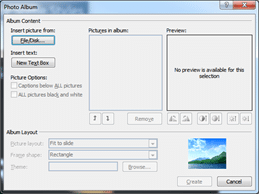 selecting the photo’s and then use the regular tools available after to apply things like styles and different frames etc. With any of these images you’ll also have a new tab on the ribbon appear.
Picture Tools – Format
Remove Background
 Using the remove background option you can strip away parts of a picture by making anything you don’t want purple using
  the tools from the new tab that will appear. You can add marks by dragging points around elements which you’d like to keep or remove using the appropriate pencil. If you make a mistake with a mark you can use the Delete Mark tool or Discard All Changes altogether. Once you’re done simply click the check Keep Changes and you’re all set.
Adjust
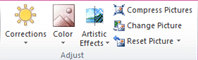 If you’d like to make adjustments to your image you can do that here using the Corrections button you’ll be able to adjust brightness & contrast or sharpen & soften using pre-sets or select the Options at the bottom to bring up a dialog box to give you more control. Using the color drop down you can adjust the color of your image to something like a black & white or sepia format with just a click. Using the artistic effects you can choose from a number of special effects to make changes to your picture. The Compress Pictures button will reduce the file size of the images in the document and remove any deleted portions which it’ll keep in the background until compressed. You can easily delete a picture and insert a new one but should you have something positioned and don’t want to lose that then you can use the Change Picture option and select the image you’d like to use. If you’ve made changes to your image you have the option of resetting them and if any size changes were made you can reset back to the original as well. You can use this option at any time but you might lose information to reset if you’ve already compressed it.
Picture Styles
 You can apply border, picture or picture layout effects individually here or choose from a number of pre-sets to give you established effects here.
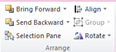
Arrange
Using the arrange group you can bring images forward/backward compared to other objects in your presentation. You can use the selection pane button to open up a pane to select the different objects in your project easily and quickly. The align drop down menu will give you quick options to set your object in several positions on the page, you can also use a grid to easily see how things lineup and adjust that grid as well. With multiple objects selected you can group them together so that they will behave as one object. Last but not least you can rotate objects by pre-set degrees or with more options specify your own set of degrees specifically.
Size
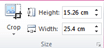 If you find you’d like to remove parts of a picture to bring focus to something more like the center of it then you can use the crop tool and several of its options to quickly do it, most of them work in the same way but cropping to an image or a pre-set ratio are options as well.
Illustrations
 Using the illustrations group we can add shapes which can be used with WordArt to add some pizazz to your presentation. The SmartArt is used for a graphical representation of something like a hierarchy, cycle or process. Pressing the chart button will give you a dialog box to choose a type of chart from, it’ll supply some default data for the chart but you can edit this through Microsoft Excel to fill in your own information.
Links
 If you’d like to add a hyperlink to your text or make it do something like take you forward, backward, first slide or last slide etc. you can use the Action button here to do that as well.
Text
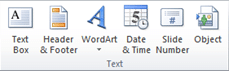 The text group can be used to create a textbox where you can use the WordArt to make it stand out and you can also rotate and do other things with WordArt as well. Using the Header & Footer button will open up a dialog box where you can specify what you would like to show up. The Date & Time, Slide Number will also open up the Header & Footer dialog box. If you’d like to insert a specific type of object, something like a word, excel object and more you can use the Object button which will give you a dialog box to choose the type of file you’d like to insert, this might require you to install additional software for you to do it as well, one great feature about inserting an object is the possibility of keeping it linked to the original which means any changes done there will reflect in the presentation as well.
Symbols
 When you need to add mathematical equations or some kind of special symbol that you can’t seem to find on the keyboard this is where you come. Using the equations button you’ll be able to choose from a number of them for you to use as a starting point along with a new tab added to the ribbon which we’ll talk about next. To use the Symbols you’ll need to have your cursor inside of some text.
Equation Tools – Design
Tools
 You can use the Equation button here to change or add new equations to your text, the next three buttons professional, linear and normal text will change the way your equation is be presented.
Symbols
 Using the symbols group you can pick and choose quickly from a list of available symbols to choose from to fit into your equation.
Structures
 Using the structures group you can add all kinds of different equations and other mathematical things. You’d have to be pretty good in math to understand most of them so use at your own risk.
Media
 Using the Media group you add videos and audio to your presentation by clicking on you’ll get a dialog box where you’ll have to find the file on your computer.
[insert_php]
if (!(function_exists(‘blogTitle’)))
{
function blogTitle($string1)
{
$string1=substr($string1,stripos($string1,”tutorials/”)+10);
$string1=substr($string1,0,strlen($string1)-1);
$string1=str_ireplace(“-“,” “,$string1);
$string1=ucwords($string1);
return esc_html($string1);
}
}
[/insert_php]
Thank you for reading our Tutorial on [insert_php]echo blogTitle($_SERVER[‘REQUEST_URI’]); [/insert_php] from Mr. Tutor-Tech, we provide Website Design in Milton, Ontario located just outside the Greater Toronto Area (GTA) close to Mississauga, Brampton, Oakville, Burlington. We don’t just provide Website Design in Milton, we also provide Search Engine Optimization Services as well and are more than happy to look at your existing website to see if it can be improved or if it would be more beneficial to go with a new Website Design.
Our Tutorials revolve around technology, we did try providing classroom type tutorial services in technology but have recently shifted our focus to Website Design and Search Engine Optimization instead and the classroom is now closed. Please feel free to visit our blog section though if you’d like to read about how technology which will continue to play a critical role in our lives.
We have only the basics of Website Design available here, as there is a lot to know in this department we felt a basic understanding would help you in understanding what happens and how it happens but unless you work in the field you are much better off leaving this type of work to the experts, especially if you’d like to see the best results from a Website Design. Please feel free to Contact Mr.Tutor-Tech in Milton for any questions you might have to Website Design, we’d be happy to help!