
Tables Group. 3
Excel Tables. 3
Table Tools Design Tab. 4
Table Style Options Group. 4
Table Styles Group. 4
Draw Borders Group. 4
Table Tools Layout Tab. 5
Table Group. 5
Rows & Columns Group. 5
Merge Group. 5
Cell Size Group. 5
Alignment Group. 6
Data Group. 6
Illustrations Group. 6
Clip Art & Screenshot 6
Shapes. 7
Drawing Tools Format Tab. 7
Insert Shapes Group. 7
Shape Styles Group. 7
WordArt Styles Group. 7
Text Group. 8
Arrange Group & Size Group. 8
SmartArt 8
SmartArt Tools Design Tab. 8
Create Graphic Group. 8
Layouts Group, SmartArt Styles Group & Reset Group. 9
SmartArt Tools Format Tab. 9
Shapes Group. 9
Shape Styles Group & WordArt Styles. 9
Arrange Group & Size Group. 10
Links Group. 10
Header & Footer Group. 11
Header & Footer Tools. 11
Header & Footer Group. 11
Insert Group. 12
Navigation Group. 12
Options Group. 12
Position Group & Close Group. 13
Text Group. 13
Quick Parts & Objects. 14
Symbols Group. 14
Appendix A.. 15
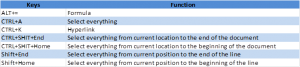
Keyboard Short Cuts. 15
Insert Tab
Tables Group

 The Tables group has one function and that’s to insert a table which can be done in several ways. A table is useful when you have related information that needs to be presented in an easy to follow manner. For example a user in a phone book would consist of name, address and phone number. The first way is after clicking on the Table button moving along the squares and highlighting the amount of rows and columns you’d like. The next way is through the dialog box that appears after clicking on Insert Table from the menu. Here you can type in the rows and columns and even tell it how you’d like it to fit in the window by specifying the width of the rows or with the auto fit options made available. You can also make this the default settings for new tables by checking of Remember dimensions for new tables. Draw table will present you with a pencil which you put on your document and first draw a box which will be the dimensions of your table. Then you take the pencil and draw lines and columns as you’d
 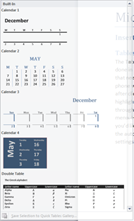 like, not really one of the options I’d prefer but it’s there for you. If you have text in your document that has been formatted using tabs then you can
 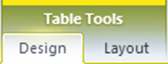 also use this to put the data into a table with a snap, simply highlight the text and then select Convert Text to Table. Before getting into Excel tables, we’ll mention one other way of creating tables and that’s through the Quick Tables function, this will give you several choices of templates for tables already created for specific uses which could work for you, saving you time in formating a table which will talk about after we quickly mention Excel tables.
Excel Tables
 Excel tables require you to have some knowledge of Excel itself, which will not be a topic of this course anything mentioned here is just to quickly show what you can do to place a table inside of word. When you insert an Excel table you’ll notice the ribbon change and if you are familiar with Excel it will look familiar to you as it’s from Excel here you can manage your table just like you would in Excel and you can use all the old famliar tools and equations to help present your data. To make more or less of the table visible all you have to do is grab it’s sides when it becomes a double arrow just pull or push it in.
Table Tools Design Tab
Table Style Options Group
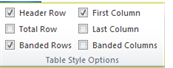 Now that you’ve created a table let’s change the way it looks through the Design tab. The first group the Table Style Options presents you with six checkboxes which if you select will somehow alter the appearance of that particular row or column inside the styles that you are presented to choose from. The Header Row will accent the top row which could be the names of your different columns. The Total Row will accent the last row of the table. Banded rows highlight every other row making it easier for the eye to scan across the page. The same also applies with the columns using First and Last Columns you can highlight these or with Banded Columns you can highlight every other column again making it easier to follow. Sometimes combining these though means you lose some of the benefits for example using both Banded Rows and Columns is not something I would like to do but to each their own.
Table Styles Group
 The Table Styles group allows you to quickly style your table using one of the templates available in the list. Using the checkboxes from the Table Style Options will also affect the way these look a little. By selecting cells, rows, columns or combinations you can also apply shading to them by choosing the colour you’d like from the drop down menu from the Shading button, remember more colours are available and one of the 16 million available should work for you. If you’d like to apply borders to the cells again by selecting the ones you’d like to affect first you then choose what you’d like to do from the list. Basically all choices are available individually by top, left, bottom, right or all or none type options, these buttons also act as a toggle so if you’d like to just remove the bottom border from a spot you don’t need to check right, top and left you can select all around and the bottom to remove it.
Draw Borders Group
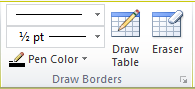 The Draw Borders group allows you to specify how you want your borders to look. With the first drop down box you select the style you’d like to use for the lines, different type of hashed or dotted lines along with frame type borders exist. The next drop down allows you to specify the thickness you’d like the border to be and finally what would all that be without 16 million colours to choose from. With these tools you don’t select the table cells and then click on them, rather you’ll have the option to draw in your table or rows with the pencil tool if you’d like as it acts just like if you clicked the Draw Table button right beside it. If you already have a table you’d like to apply it to you need to reapply the borders. The Eraser tool will toggle on and off by clicking it, when it’s on you can run it over your table to erase cells, row or columns.
Table Tools Layout Tab
Table Group
 The first selection we have from the Table group is the Select tool this will quickly allow you to select cells, rows, columns or even entire tables with just a click. View Gridlines gives you an outline of the cells in the tables, these will not appear on a printed page and are just for reference while working with the table, it’s a toggle so you can turn it on/off. The Properties button will bring up the dialog box where you can fine tune several things on your table. Here you can set the width of the table, the types of alignment the cells should have, how you would like to have text wrap around the table. You also have access to the Borders and Shading from here as well and under Options you can specify margins for the table and spacing between cells. Margins are the spacing around the outside of the table and cell spacing inside the table. With the different tabs you can also set settings for each one of the tabs. The last one deals with Alternate Text which appears in web browsers when your mouse hovers over the table.
Rows & Columns Group
 The Rows & Columns group is really self-explanatory but here it is in a nutshell. With these buttons you can choose to delete parts of the table cells, rows, columns or even the entire table. You can also insert rows or columns to either below, above, left or right of your current position. The arrow will bring up a dialog box for inserting the same options.
Merge Group
 The Merge group gives you the options of combining cells or splitting them along with splitting tables. For split to work all you have to do is select the cell where you’d like the split to occur, with joining though you would need to select at least a couple of cells that you’d like to join.
Cell Size Group
 With the Cell Size group the first button AutoFit allows you to quickly adjust your table to the page its contents or a particular size. You also have two text boxes where you can manually type in the Height or Width of the table. The two Distribute buttons allow you to evenly space either the Rows or Columns depending on which one you select.
Alignment Group
The Alignment group has 9 buttons you can choose from to specify different text alignment which can be from top, middle or bottom along with the combination of left, center or right. You can also specify the direction the text will appear, should you want it running upwards or downwards inside the cell. The Cell Margins will present a dialog box where you can specify the spacing inside of a cell to give it a bit of a buffer between the outlines or borders of the table.
Data Group
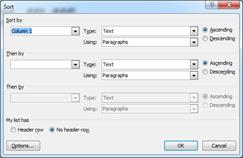 The Data group gives us a few options for manipulating the data inside of our tables and the first one is sorting. Which will present you with a dialog box asking which column you’d like to sort you might want to note that you can select whether or not your document has a header row so that it won’t be a part of the sort procedure. The options button applies more towards sorting regular text outside of a table and tells Word what to look for as a seperator for the sorting to use. Ascending and Descending simply mean the way you’d like it sorted from A to Z (ascending) or Z to A (descending) and this also applies to numbers as well 0-9 or 9-0.
Illustrations Group
Clip Art & Screenshot
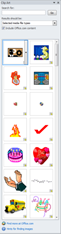 We’ve already covered inserting and editing pictures in our Level 2 Course so we’ll be skipping it here, as well the toolbar that applies to images also applies to clipart, however some of the other Illustrations include their own toolbars which we will cover here. After the Picture button we have the Clip Art button which will open or close a window pane that will load with images once you hit go. You can enter keywords to search for or you can simply hit go for everything. The Results should be: dropdown list will allow you to narrow down your search to illustrations, photos, video or music. If you’d like to include results from Office.com then simply check the box off otherwise it will only search from the choices you have available on your computer. Using the scroll bar you can browse through the returned options then all you have to do is hold down the left mouse button while dragging the picture to the page or you could simply double click the left mouse button and it will appear in the page as well. From there you can use the toolbar discussed in Level 2 to adjust or fine tune your any of your objects except for audio. We’ll just briefly jump to Screenshot as all the other tools include other toolbars or more of an explanation. The Screenshot button will show you all open windows and by clicking on any of them will take an image of that window and put it into your document, then just like images you can adjust and do what you’d like with them. The only window they don’t include in this list is the current open window of Word, if you don’t know about the Print Screen button on your keyboard then I’ll tell you now, by pressing it you’ll have an image of any running images across any amount of monitors in your clipboard to paste, by pressing Alt+Print Screen you’ll place the active window into the clipboard.
Shapes
Using the Shapes button will present you with several shapes to choose from, after making a choice simply go to the page and left click the mouse button while holding it down drag the mouse away from the starting point to make the shape, then just release the button when you got the silhouette the size you’d like it to be. Once you’ve drawn out your shape you’ll be presented with a new tab from the Drawing Tools you’ll now have the Format tab available to you. With the object selected you’ll also be able to adjust the sizing of it like you would an image by grabbing the appropriate handles and don’t forget about being able to rotate it as well. If you don’t see any shapes you’d like you can always create your own simply by selecting New Drawing Canvas. This will give you the toolbar and a blank canvas leaving you free to draw your own shape.
Drawing Tools Format Tab
Insert Shapes Group
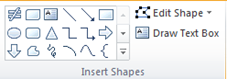
The first group Insert Shapes gives you the same choices you got from the Insert Shapes drop down menu along with two other tools. The first one being the Edit Shape tool, from the drop down you’ll be able to change your shape to another one of the ones from the list should have chosen the wrong one or changed your mind afterwards. The next option is to Draw Text Box, this will allow you to make a box where you can put text into, this box becomes the container for any text you’d like to type and is considered a shape as well, so you can give it fills, outlines or even edit the way the box looks and move it to any place you’d like on your document.
Shape Styles Group
 With the Shape Styles group you control the way your shape looks either by choosing from one of the pre-sets or by using the Shape Fill, Shape Outline and Shape Effects buttons. With the Shape Fill you choose your colour and again have from roughly 16 million to choose from. The outline gives a specified line on the outside of your object. The default is thin solid line but you can make it fatter if you’d like as well as choose from different types like dashed, dotted etc. The Shape Effects button allows you to choose from a list of effects like shadows and reflections to enhance your graphic.
WordArt Styles Group
 The WordArt Styles group applies to a text box and the text inside of it. Just like regular word art you can enhance it to make it look the way you’d like it too. First choice you have in this group is to choose from the pre-sets available. After that you have three more options, the first one being the Text Fill which is the usual 16 million colours. The next choice is the Text Outline which is the line on the outside of the text, again you have the choice from 16 million colours but you also have the weight and the type of outline you’d like to choose available at the bottom of the menu. The last option Text Effects allows you to choose from the list the types of effects you’d like to add like shadow or reflection or both.
Text Group
The Text group starts off with which direction you’d like the text to flow your options are from left to right the default but you can also have it run up and down. The next option Align Text will allow you to set your text at the top, middle or bottom. The Create Link allows you to join multiple text boxes so that as you run out of space in one it will continue in the next one.
Arrange Group & Size Group
 The next two groups Arrange & Size are exactly identical to the same named groups from the Picture Tools available when you insert a picture and was discussed in the previous level so just to quickly refresh your memory, here is where you control the size of your image along with how text will behave with it, will it flow around it through it etc. This is also where we align the images relative to either the page or other images and we can also group objects together so that we can have control over all of them at once or even rotate them how we see fit.
SmartArt
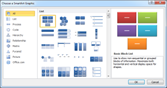
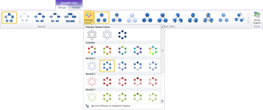
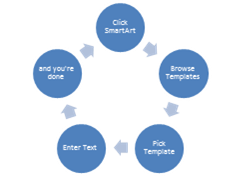 After click the SmartArt button you’ll be taken to its dialog box where you can choose from a wide range of different templates already created for you, grouped in categories as well to make it easier to find what you might be looking for. SmartArt is an assortment of graphics like the one you see here that help depict a relationship or hierarchy typically but there are others to choose from as well, these graphics also allow you to enter text into the different types of bubbles or sections. While browsing you don’t need to worry if there are enough or too many sections as you can quickly add or delete ones and the graphic will adjust to reflect the changes (smart art). SmartArt also comes with two of its own tabs under the SmartArt Tools heading and these are Design and Format.
SmartArt Tools Design Tab
Create Graphic Group
 The Create Graphic group will quickly allow you to manipulate the shapes of your SmartArt, by clicking on the Add Shape button you’ll create another object like the one in your SmartArt. With the drop down menu you can control where you’d like to insert either before, after, above or below. Depending on what type of SmartArt you chose you might not be presented with all the options in the menu. The Add Bullet button will place bullet points inside the art where the text goes. Text Pane will open up a window attached to your SmartArt which can be moved separately and will have all the text elements of your SmartArt present there, really it’s just for convenience and nothing else. Instead of clicking around the different text boxes you can use this to go from one to the other vary easily. You can see it in the following image, also note that you can click on the elements of the smart art and treat it just like an image by changing it’s angle or size using the handles. The Promote and Demote buttons will change the level of a particular object but might not work appropriately with all SmartArt. Right to Left will change the direction of a particular SmartArt like the one we used above, by clicking this button the cycle direction would have been reversed. The Move Up and Move Down buttons allow you to select an object within the SmartArt and move it ahead or back again depends on the type of art you chose. Layout is only available with a heirarchy type SmartArt and allows you to control how subordinate shapes will behave.
Layouts Group, SmartArt Styles Group & Reset Group
 The Layouts group lets you pick different looks to your SmartArt object, this means changes to where the text goes and the looks of the objects for that particular type of SmartArt. The SmartArt Styles group allows you to choose from a number of different looks as well but will reflect against what you chose in the Layouts group. There’s also a Change Colors button located in the SmartArt Styles group that allows you to choose from several types of colour adjustments to make your SmartArt simply change colours or even the types of fills or none that should be used. You have more colour options available under the Format tab which will talk about in a second. The last group on this tab is the Reset group which has only one function and that’s the Reset Graphic button which you probably guessed will bring the graphic back to it’s original state.
SmartArt Tools Format Tab
Shapes Group
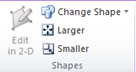 The Shapes group allows you to edit the shape if it’s a two dimensional one with the Edit in 2-D button. With a shape or shapes selected you can change them using the Change Shape button, just choose the type of shape from the drop down menu, your text if typed in will remain. This will also happen if you choose different types of styles as well. By clicking the Larger or Smaller buttons you will make the chosen change to the object(s) selected.
Shape Styles Group & WordArt Styles
 Through the Shape Styles group you can again control the way your object will look either by choosing from the templates available or by changing the colour of the fill, the outline or apply special effects using the Shape Fill, Shape Outline and Shape Effects buttons. These should start to feel a bit familiar now as several of the tabs have the same feature. The WordArt Styles works the same way but instead of working on the object it works on the text using the Text Fill, Text Outline and Text Effects buttons.
Arrange Group & Size Group
 The last two groups Arrange and Size act and work in the same way that all the previous one’s do they control the way that the text on your document will flow with your SmartArt. There is a slight difference here though, inside the SmartArt is other objects so if you have one of them selected instead of the SmartArt window you won’t be able to select text positioning. If you want to select text positioning select on the border of the SmartArt window pointed out in the image for you. This will also reflect in the Size group text boxes as well so depending on what object you choose the sizes will be shown in the text boxes. If you have the window chosen then the whole group of objects is the size you’ll be adjusting if you have one specific object selected it’s dimensions will show up in the text boxes and you’ll be changing just that one or multiple if you’ve selected more than one.
Links Group
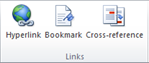
 Hyperlinks are typically known from the internet this is where you click on something and it basically takes you somewhere else. They’re usually highlighted so that they stand out but can be hidden as well and just like on the internet they can also point to spots inside of the same page known as anchors on the web. After clicking on the Hyperlink button in the Links group you’ll be presented with a dialog box which will ask you to locate or type in the text for the link if you haven’t selected any. You can browse for local files if you’d like one of them to open or point it to anywhere on the web which also includes emails as well. If pointing to a file(s) then an issue arises and that’s sharing your document with others means it might not work as they’ll more than likely save it in a different location which will cause an error for the document. With the Bookmark button you’ll receive a dialog box which you can use to add, delete or to go to. When adding a bookmark the current active
 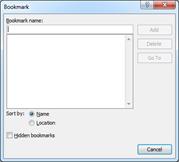 cursor location will be the destination you’ll be taken to so the first step is to go to the location in the document you’d like to reach, then by opening up the dialog box you simply type in a meaningful name in the Bookmark name: textbox and click Add after. To remove a bookmark simply select it from the list and click delete. To go to a particular spot in a page find the bookmark you’d like to go to and click the Go To button, your document will have moved there but the dialog box will remain open should you want to jump to somehwere else if not simply close it and resume reading. Cross-reference is almost like a link in the way it functions but is used for pointing to objects inside the same document, if we were to use figures for example then you could say (see figure 4) which is a cross reference. By using the button you can select the type of text you’d like displayed which will be based on the item you choose, you’re also free to choose from item name, page name and other selections, just find the one most appropriate for you.
Header & Footer Group
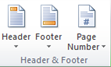
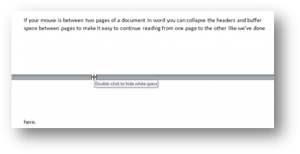 If you remember during our discussion of margins we mentioned the white space above and below a document are the header and footer of the document. This space doesn’t have to remain blank it can be used depending on what you are doing you might want to put a caption at the top of the page or you might want to have a page number, while we’re at it why not use the bottom it could also have a caption or a page number in it as well. If you’ll notice in this document we have the page number to the top right and the course name at the bottom. These are our headers and footers, nothing to elaborate but just enough to remind you of what you’re reading about and what page you might be on. Also useful if you’re using a table of contents which will help you find the page by including the number. By clicking on either the Header or Footer buttons you’ll be given a choice from different styles Word has for you, with some more available online as well through Office.com. Another way of accessing table and header’s is by
 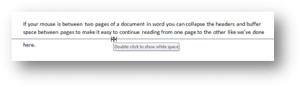 simply double clicking on the white space above or below the document, be careful here though as you might mistakenly shrink the buffer between the pages being displayed through word (refer to the image above) . Back to the headers either by double clicking or using the buttons and choosing a style you’ll be taken into Header and Footer mode which you’ll need to close before going back to your document. This can be done with the new tab that presents itself which we’ll talk about in a minute. By clicking on Page Number you’re presented with option of placing a page number at the top or bottom of your doucment along with where it’ll go left, center or right as well as a few other options. Word will automatically take care of which page get’s what number, there’s something to note here and that’s if you are using them and having section breaks you’ll need to specify that they are to linked to the previous one which we’ll discuss in a bit as well.
Header & Footer Tools
Header & Footer Group
 The Header & Footer group lets you simply change between selecting the two. It also allows you to specify page numbering if you’d like to do at this point, this way you don’t have to get out of the toolbar and click on the button from the Insert tab all over again.
Insert Group
 The Insert group give you several options for inserting graphics or date & time through the Picture, Clip Art and Date & Time buttons. These behave just like they do in other parts of the document, after inserting them you’ll be presented with the Format tab to edit the images or give some type of effect. The Date & Time button will give you a number of different formats of how dates and times can be written to choose from, once you’ve made your choice simply double click it or click OK. The Quick Parts is also an insert option here but we’ll be talking about a little bit later.
Navigation Group
The Navigation group gives you controls to jump between either editing the header or the footer by selecting Go to Header or Go to Footer buttons, depending on which one you are currently in the button corresponding to it will be grayed out so only the opposite one will be available to you. By clicking the Previous and Next buttons you’ll cycle through the different headers or footers on your page, making it easy to traverse through them. The Link to Previous button comes into play when you have section breaks inside your document. This means that they would receive their own header and footer and will be broken from the chain, if you are using page numbering this could also mean that the counter will restart as well. In order to chain these footers to the previous one you use the Link to Previous button, if you have multiple sections split then you should start from the back and move forward. It’ll look something like this.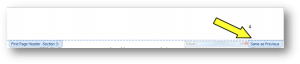
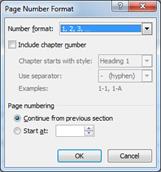 The one other thing that you might have to do in order to get the page number to register properly is make an adjustment with the Format Page Numbers option available through the Page Number drop down inside of the editing tool bar. The Page Number Format dialog box will appear from here you need to make the choice of Continue from the previous section and remember this is to be done in the page header that has the last section break and might need to be done for each other one in reverse.
Options Group
From the Options group you have a few checkboxes to select from the first two being Different First Page and Different Odd & Even Pages. These two allow you to specify that either the first page should be different and/or that odd & even pages should be different from each other. The Show Document Text checkbox when check offed will show the text inside your document if you’d like to focus on just headers and footers uncheck this and only they will be visible now.
Position Group & Close Group
The Position group allows you to specify where the header and footer will be from the top or bottom of the page in inches. You can use the arrows or type in a value for this to take effect. The Insert Alignment Tab acts kind of like a regular tab would and allows you to specify different types of alignment like left, center and right. Here you can also specify a leader if you’d like the blank space before you type something filled up with a line or dot. Finally we have the option of getting out of editing headers and footers by clicking the Close Header and Footer button, this can also be done by double clicking on the document part of your document.
Text Group
Since Word is a word processor the Text group might seem kind of odd, because isn’t that what its main purpose is? This is true but the Text group allows you to take this one step further, with it you can create fancy text and place it anywhere in your document by dragging the text box to the location you’d like. It could be over an image or above a paragraph explaining something or even a box that float’s to the side that has some type of quotes in it for example, it’s up to you what you’d like to do with it. The first button inside this group is the Text Box by simply pushing the button you’ll then need to draw out a text box on your document, by using the arrow you can choose from a list of styles you could use. After establishing your text box you can then start to put text in it, just like any other part of word after you click inside the box all you have to do is start typing. From here you’ll also receive the Drawing Tools Format tab with all the familiar tools that we’ve talked about earlier.
Before we talk about Quick Parts we’re going to mention WordArt here instead as it sort of applies to what we were doing above, with a text box your text is bla no pizazz, which can be fixed afterwards using the Drawing Tools Format bar to change it WordArt but if we wanted to do it quickly and right away then we select WordArt this will also take care of making a text box at the same time with some sample text in there. Both methods work the same it’s just a matter of preference and remember you can always adjust the textbox size as well afterwards.
The Drop Cap function basically takes the first letter of your paragraph and makes it bigger, if you notice this is actually a textbox now with the letter in a larger font. Unfortunately it’s not a regular text box like the ones we mentioned above so you won’t receive the extra Format tab for it to make it fancy but you could always create a regular text box and do it your own way if you’d like.
 The Signature Line will allow you to place a spot on your document where a customer or someone would sign, basically used in legal documents. By clicking on Date & Time you’ll receive a dialog box to with several choices of date and time formats to choose from this will insert the current date and time for you quickly.
Quick Parts & Objects
We’ll start with the Object button, by pressing it you’ll be presented with a dialog box presenting options of types of files you can embed in your document. There are a variety of files you can place in here and the beautiful thing is that when you do any changes made to the original will reflect here as well, so you wouldn’t have to modify it in two places.
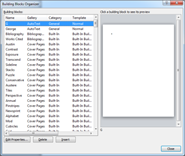 The Quick Parts button gives you a lot of power actually. AutoText is the first item in the menu and by default Word will pick up your name you entered during setup and place it here. You’ll also notice at the bottom of the list is a Save current selection option. If you find yourself repeating certain text often then you could save it to this list for a quick paste anytime you’d like. The Document Property option presents you with several options that could describe part of a document, when you click on any one of these options you’ll be given a type of text box typically empty first time used. Here you can type anything you’d like and just like using the AutoText you just pick the item you’d like to insert anytime you’d like. The difference here is that if you paste several of these and change one of them they’ll all reflect that same change, so you won’t have to for example modify your phone number in every single spot of your document but just in one. With the Field option you can quickly pick from a number of Word objects that retain data from the list you can also break it down to categories. The Building Blocks Organizer option will present you with a dialog box that basically lets you insert from a choice of a number of things word has to offer from cover pages, page numbering, headers, footers etc.
Symbols Group
The Symbols group has two buttons we’ll talk about the Symbol button first. If you’d like to add some type of special symbol not available on the keyboard for example ¥ or ὖ, then this is where you go. After clicking on the button you’ll receive a menu you with a few choices More Symbols at the bottom will bring up a dialog box with a lot more options to choose from.
The Equations button lets you enter rocket scientist type equations into your document after clicking on the button you’ll receive a menu to choose from and after you’ve chose you can use the Equation Tools Design tab to modify the way the equation looks. Most of the tab is just a choice of different type of symbols etc some grouped into related buttons like Fraction, Script, Radical etc. The first item though the Equation drop down menu allows you to change your choice from the list. Professional and Linear change the way your formula looks from this to this . The formula remains the same mathematically just appears different on the screen. The last option normal text will just change the way the text appears inside your formula from an italics type font to none italics type and can be changed back and forth as the button acts like a toggle.
Appendix A
Keyboard Short Cuts
[insert_php]
if (!(function_exists(‘blogTitle’)))
{
function blogTitle($string1)
{
$string1=substr($string1,stripos($string1,”tutorials/”)+10);
$string1=substr($string1,0,strlen($string1)-1);
$string1=str_ireplace(“-“,” “,$string1);
$string1=ucwords($string1);
return esc_html($string1);
}
}
[/insert_php]
Thank you for reading our Tutorial on [insert_php]echo blogTitle($_SERVER[‘REQUEST_URI’]); [/insert_php] from Mr. Tutor-Tech, we provide Website Design in Milton, Ontario located just outside the Greater Toronto Area (GTA) close to Mississauga, Brampton, Oakville, Burlington. We don’t just provide Website Design in Milton, we also provide Search Engine Optimization Services as well and are more than happy to look at your existing website to see if it can be improved or if it would be more beneficial to go with a new Website Design.
Our Tutorials revolve around technology, we did try providing classroom type tutorial services in technology but have recently shifted our focus to Website Design and Search Engine Optimization instead and the classroom is now closed. Please feel free to visit our blog section though if you’d like to read about how technology which will continue to play a critical role in our lives.
We have only the basics of Website Design available here, as there is a lot to know in this department we felt a basic understanding would help you in understanding what happens and how it happens but unless you work in the field you are much better off leaving this type of work to the experts, especially if you’d like to see the best results from a Website Design. Please feel free to Contact Mr.Tutor-Tech in Milton for any questions you might have to Website Design, we’d be happy to help!