
Table of Contents Group. 2
Footnotes Group. 3
Citations & Bibliography Group. 3
Captions Group. 3
Index Group. 4
Table of Authorities Group. 4
Review Tab. 4
Proofing Group. 4
Spelling Dialog Box. 5
Grammar Dialog Box. 5
Language Group. 6
Comments Group. 6
Tracking Group. 6
Changes Group. 7
Compare Group. 7
Protect Group. 8
View Tab. 9
Document Views Group. 9
Show Group. 10
Zoom Group. 10
Window Group. 10
Appendix A.. 11
Keyboard Short Cuts. 11
References Tab
Table of Contents Group
 Word allows you to place a table of contents in your document quite easily. From the dropdown menu you’ll have a few options to choose from. The first two are automatic tables of contents and if you have been using styles with headers then you might be fairly impressed to see a table of contents appear like magic with headings filling in the words and page numbers automatically entered as well. The difference between the two is the title, one says Table of Contents and the other just says Contents. The manual one will give you a layout of a table of contents for you to work with, but will not
  automatically enter any data hence the term manual. You also have another option here for inserting a TOC (Table of Contents) and that’s Insert Table of Contents at the bottom of the drop down menu. With this option you have a bit more control of the way your TOC will look as well as how many levels of headers you’d like to follow by specifying it in the Show Levels box. You can also specify if you’d like to use page number or hyperlinks instead. By checking off Show page numbers the TOC will display the page number detected and by checking of Right align page numbers they’ll be pushed over to the right side of the page, sometimes when doing this you’d like a Tab leader or dots to go between the heading and the page number itself you can choose these from the drop down menu. The last and final option of the menu is to remove the TOC. Once you’ve created a TOC you might make some changes to your page which will make it incorrect, again if you are using headings then you’ll be able to easily just click on update and the information will be updated automatically. This can be done either by click on Update Table inside the Table of Contents group or by clicking on the TOC itself you’ll notice a tab appear at the top, by clicking this you’ll be presented with an option of either updating just the page numbers or re-scanning the document. I recommend rescanning the document as if any heading changes were made then this will be corrected as well not to mention there’s not really a big time difference between the two, safer is better in my eyes. With this tab you’ll also have the option of changing or removing the TOC just you like you do with the Table of Contents button inside the Table of Contents Group. While working on your document you might want to add content to the TOC, using the Add Text drop down you can quickly give your word a heading or none at all through it’s choices.
Footnotes Group
Using the Footnotes group you can easily add notes to the bottom of your page giving reference to other books or material which helped or is related to what you wrote. A footnote will leave a number reference in the paragraph you’d like to reference that will match the number and note that’s added to the bottom of the page. Insert Endnote insert a note at the end of the last paragraph instead of at the bottom of the page. You can use the Next Footnote button to cycle through the footnotes by using the drop down menu you can move backwards as well as cycle through end notes. The Show Notes button will allow you to move through the document and show you where the notes are.
Citations & Bibliography Group
 The Citations & Bibliography group allow you to enter source information like books, journals, the web, movies etc. The first button Insert Citation allows you to insert a citation at your current location which will refer to a bibliography or citation list which would be placed at the end of your document. If you currently have nothing listed in the Source Manager then you won’t be able to add a citation, to add to the list you can click on the Manage Sources button or Add New Source from the Insert Citation drop down list. If you don’t have the information yet to enter you can always add a place holder, which will be added to your source list, afterwards you just come in update the information and the citation in your document will automitcally get updated. Once you are finished your document you can add the Biliography or Citation list at the end simply by clicking the Biloiography button and choosing between the two, Insert Bibliography at the end of the menu will insert the Bibliography without a title. If you’ve made style changes to a bibliography and would like to save it to the list then simply highlight your bibliography and select Save Selection to Bilography Gallery. By using the Style drop down menu you can change the way your bibliography or citation look by scrolling through the different options available.
Captions Group
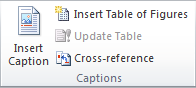 Occasionally when working with tables, figures, images etc. you might want to add a caption to that object or possibly even a reference inside your text that point to that particular object. The Captions group is where this can be done. Insert Caption allows you to quickly add a caption to the object you’ve selected through its dialog box you can specify the location and type of label it should receive, like figure, table etc. You can also create your own label here as well, Word will take care of the numbering for you. If you’d like to be able to reference your figures from a table similar to the Table of Contents then you can do so quickly using the Insert Table of Figures button, this will give you a dialog box very similar to the one you do get with the TOC, with choices like link or page number, right alignment, dots between etc. Also just like a TOC you can update this table as you make changes to your document simply by clicking on the Update Table button located in this group. The Cross-reference button allows you to enter a note in your text that will point to another object and can be used as a link to the object by holding down the CTRL key.
Index Group
 The Index group is where you go to introduce an index to your document there are two parts to this the index list itself and the words you’d like to index. To add a word to your index you simply just highlight the word and click the Mark Entry button. After that you’ll receive the Dialog box where you can specify the details of your marked entry, with things like Cross-referencing them to other objects, along with Bolding or Italicizing the fonts. With Insert Index button word will take your current location and drop the index list there, this can also be updated just like a table of contents by clicking on the list and then clicking the Update Index button.
Table of Authorities Group
 Table of Authorities group allows you to add a table of authorities to your document this is usually done in legal documents. The first step in the process is to add stuff to your table by selecting Mark Citation, after highlighting your text simply click this button. A dialog box will appear asking what type of category it is along with what you’ll call your citation. There are three boxes the Selected text, Short citation will show you’re selected text all you need to do is clean any extra characters from there and you’re good to go. By clicking on Next Citation you’ll be taken to what Word thinks is another Citation. Once you’re ready to insert your Table of Authorities just find the spot and click on the button, a dialog box similarly to the table of contents or the table of figures will show up asking you how you’d like the list to look and then there’s also the Update Table button that works just like the other by selecting the table and then clicking on the button any new information or changes will show up in your list.
Review Tab
Proofing Group

Proofing a document in Word is very simple and although the tools in Word aren’t that complicated they have come a long way since I was first introduced the spell checker. Now it highlights your mistakes as you make them with either red or green lines letting you know immediately that there’s been a mistake in your document. The thing to remember is that these are suggestions and sometimes you could actually be correct, they tend to be grammatical and may include slang or sayings that we’ve picked up somewhere.
The first button in the Proofing group is the Spelling & Grammar button by pressing it one of three things will happen.
- If your document is clear of mistakes then you’ll receive a pop up that says The spelling & grammar check is complete.
- If your first error found from your current location is spelling mistake then you’ll receive a dialog box like the one you to the right.
- If your first error found is a grammatical mistake then you’ll receive a dialog box like the one to the left

*note that the two boxes are slightly different and offer different options. Both boxes offer the Check grammar checkbox if you’d like to just check spelling uncheck this.
Spelling Dialog Box
With a spelling mistake you’ll have the following options available to you. Ignore Once means don’t change the item highlighted but continue checking for this same mistake again. Ignore All means ignore all these spelling mistakes in your document. Sometimes you might receive mistakes on something like a company name or something like that, instead of having the spell checker tell you this is a mistake every single time you scan a document, you could just add it to the dictionary that Word is using. You do this by selecting Add to Dictionary. If you find that Word is correct with its detection and has a correct suggestion for you then you could change it by selecting the right one from the list and pressing Change, if you think you’ve done this mistake on multiple occasions then there’s Change All which will change this mistake throughout your whole document. AutoCorrect will let word change it to what it thinks it should be probably the first item in your suggestion list.
Grammar Dialog Box
With the grammar dialog box we have similar options, we can Ignore Once which will detect the same mistake after and makes no changes. We could chose to Ignore Rule which will look past that type of grammatical error. If you’re unsure of what type of grammatical error you made, you could always click on the Explain button which will open another window with the explanation in it. Next sentence is used to basically move on and keep the grammatical error there so it’ll be picked up again next time and Change will obviously change to the suggestion. A lot of time the change will need to be made by you if you feel you’ve actually made a mistake as Word might not have a suggestion and can’t interrupt what you were trying to say. Sometimes just re-arranging the way you are saying it helps other times I find re-writing the sentence in a completely different manner sounds better and is correct.
The following three buttons in the Proofing group are fairly useful as well. The Word Count button will give you a summary of how many characters, characters with space included, words, paragraphs, lines and pages are present in your document. The Research and Thesaurus button will open up a new pane that will give you the option of looking up the dictionary meaning of the highlighted or typed in word and the thesaurus will present you with other words that could be used.
Language Group
The Translate button of the Language group allows you to do exactly what it says and presents you with a few ways of doing it through its drop down menu. The first option will send a copy of your document to Microsoft for translation. The second one will allow you to highlight what you’d like translated and present you with a finished product in the window pane that pops up. The last one is kind of neat, it’s a toggle type of function so it’s turned on and off from the same location. When it’s on and you highlight a word the translation will display itself right by your mouse. Choose Translation Language the last option in the menu you allows you to specify the languages you’ll be translating from and too. The Language button right beside the Translate button lets you tell Word what language you’d like to proof the document in by clicking Set Proofing Language, this will give you a dialog box to choose your language. The Language Preferences function will allow you to set the default language you’d like word to use, by changing the Set Proofing Language option just before then you would override this setting.
Comments Group
 Comments are a nice way for you to make notes on what you are working on but they play a much bigger role when there are multiple people working on the same document, this way other people can let you know where you might have made a mistake, needs improvements etc. By clicking on the New Comment button you’ll get a red text box off to the side of the page pointing to the current cursor location. The comments line will be multi-coloured when working with multiple users and will carry their initial after the word Comment along with a number corresponding to the comments that have been made. You can easily cycle through the comment in your document using the Previous and Next buttons. To remove comments simply click on the comment and click Delete button, the drop down menu allows you to also delete all the comments at once if you feel like leaving them until you are done.
Tracking Group
When working with multiple users Word offers a unique tool called Track Changes, which is activated and deactivated by clicking on the button. With the drop down menu, you could also turn it on or even change the options of what colours will be used to represent the users. Should others want to use your computer they can easily change the name that’s held in the Word Options window, this way their changes will be different from yours.
![]() With tracking changes turned on they’ll be two views available to you, Original and Final. They’re available from the drop down list in the top right of the Tracking group. They are also available in two flavours each one with Markup and the other without. Without showing the Markup which we’ll get to in a minute the Original view will show what the document looked like before any changes were made and the Final view will show what it looks like after. Depending on how you choose to view the Markup, Word will display changes made in a variety of ways as long as the show markup option is picked in the drop down list mentioned above. The Review Pane also displays changes made in its own format, which can be turned on with Reviewing Pane button which acts as a toggle as well. The drop down menu will give you the option of display it vertically or horizontally.
With tracking changes turned on they’ll be two views available to you, Original and Final. They’re available from the drop down list in the top right of the Tracking group. They are also available in two flavours each one with Markup and the other without. Without showing the Markup which we’ll get to in a minute the Original view will show what the document looked like before any changes were made and the Final view will show what it looks like after. Depending on how you choose to view the Markup, Word will display changes made in a variety of ways as long as the show markup option is picked in the drop down list mentioned above. The Review Pane also displays changes made in its own format, which can be turned on with Reviewing Pane button which acts as a toggle as well. The drop down menu will give you the option of display it vertically or horizontally.
Changes Group
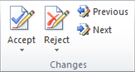 When tracking changes you need to Approve or Reject the comments for them to take effect. You can cycle through the changes using the Previous and Next buttons. The Accept button has a drop down menu that you can choose to Accept and Move to Next which is self-explanatory, Accept Change which accepts the current change, Accept All Changes Shown and Accept All Changes in Document. The Reject drop down is exactly the same except rejecting the change.
Compare Group
 The Compare button gives you two options to see the differences between documents. The first option is Compare and it will ask you for the name of two documents in a dialog box that’ll pop up. After entering two documents and clicking OK you’ll see 3 window panes. One of them is the compare window pane where it’ll show the differences of the two documents in it and then there are the two separate window panes, each containing its own copy of the two documents you’ve selected. Changes or differences will be highlighted throughout the different document window panes.
The Combine method allows you to open two documents like you did with Compare. Although the windows seem to look the same as they did with compare there are slight differences. With Combine you have the option of saving the new document with the combinations from the two you selected. This comes in real handy when you want to combine from more than 2 documents, for example a 4 person team working on a legal document. Now you can combine the first two documents you opened save it as a new one, use that name to combine it with another one of the 4 users and repeat that step again so that you have all the changes committed by all the users. This is not mean to replace track changes but is meant to be used when track changes might not be able to, maybe it was never turned on or possibly not even available because someone could be using a different word processor or older version for example.
Protect Group
 The first button Block Authors in the Protect group will more than likely be greyed out and not available unless you’re file is saved on a SharePoint server. If this is the case then you can restrict what users will be allowed to use your document.
 The Restrict Editing button is a very useful tool, by clicking a new pane will open presenting you with a few options. The first checkbox at the top applies to limiting the formatting options available to users, by checking it off and clicking on Settings another dialog box will open up. From here you can narrow down what formatting options from the ribbon will be available. To restrict users to only using styles and preventing them from custom formatting a document, click on Recommended Minimum. This way you can keep your document looking uniformed even though several people might be editing it, saving you time on having to reformat the document later. The second checkbox will allow you to set your document to behave in a certain way like a read-only document now allowing changes or maybe allowing you to just make comments. It will also present you with a second option and that’s restricting it to only certain users. By clicking on the Yes, Start Enforcing Protection button you’ll be prompted for a password, you can leave this blank if you’d like which will still enforce the restrictions but anybody that’s using the document can easily stop it then, as the Stop Protection button will be available and without being prompted for a password anyone will be able to stop it. By adding a password you’ll need to provide it to another user in order to stop the restriction. You’ll also have another couple of options available to you when restriction is on, in the pane you’ll now see two buttons that you can use to Find Next Region I Can Edit button for exactly that or you can use Show All Regions I Can Edit and the checkbox Highlight the regions I can edit to be able to see what you can while moving through the document.
View Tab
Document Views Group
The Document Views Group doesn’t change anything in your document but will change the way you are viewing your document. Print Layout the default view lets you see your document the way it would look printed out. Full Screen Reading removes most of the tools from the screen and uses your whole monitor to display the document. Web Layout is the way it would look like on a web page. Draft view simply uses more of your monitor and doesn’t give you a finished type of look.
Outline view presents you not only with a different view but also a new tab that’s made available. It’s mainly used to re-arrange sections of your documents making it easier to grab a full paragraph and switch its location. You might want to note that the pictures in the document are supressed I this view as well.
 The Outlining tab will give you options of moving the selected heading or text up or down through the hierarchy of the document, along with the ability of changing the level it’s at. By using the green arrows you can promote or demote your selection. The double arrows are either a promote or demote to the top or bottom level and the single arrows do it by a single level. The Up and Down arrows, allow you to move through the document and the plus and minus signs allow you to expand or collapse sections, this just hides or shows them and doesn’t alter them at all. With the Show Level drop down, you can select the level of headings you’d like to view, this will either expand or collapse other levels depending on what’s in your document or what your choice was. Show Text Formatting will display the formating with the text otherwise it’ll just be displayed as plain text. Show First Line Only will hide all other lines except the first one. The Show Document button will expand the Master Document Group, providing you with a few new buttons, Create, Insert, Unlink, Merge, Split and Lock Document. The Create button will allow you add a section to your document, Insert allows to browse for a sub-document to add to your document and Unlink will remove it. If you’d like to merge the two documents then select and click the Merge button, to split them or separate them click on the Split button. The Lock Document button will prevent you from making any changes to the document while it’s on. Last but not least the Close Outline View will close this view and take you back to the last view you used prior to opening Outline view. You can also use the plus and minus signs inside your document to expand and collapse sections as well, simply by double clicking on them.
Show Group

The Show Group has three checkboxes which you can use to display or hide the Ruler, Gridlines or Navigation Pane. It’s fairly straight forward actually.
Zoom Group
The Zoom group has a few pre-set options for you to choose from, all they do is control the zoom level that you’re viewing your document at. The zoom button will present you with the dialog box with more choices. All the other buttons will take you to a pre-set zoom level which will match the description that it carries with it. One page is equal to 91{463c70c279fb908728b910a090d44fbe4ae7aabcd875de9c1a518a8c8e2be8bd}, two page is 87{463c70c279fb908728b910a090d44fbe4ae7aabcd875de9c1a518a8c8e2be8bd} and Page Width is 173{463c70c279fb908728b910a090d44fbe4ae7aabcd875de9c1a518a8c8e2be8bd}. This also depends on the your monitor settings as well as well as what Window panes you might have open along the side.
Window Group
 The Window group allows you to manage multiple windows and even open a new window of the same document you are currently in. This way you could view different parts of the document at the same time if you needed too. The first button New Window does just that, it’ll open the same document you are in a separate window, convenient when maybe needing to examine one paragraph while working on another if you have them set so you can so both or all documents. This can be done by clicking Arrange All which will tile all your windows on your screen. You don’t necessarily need to open a new window though, as you can split the one you are currently in with the Split button this will give you a bar where you place where you want but midway down the document should be best to give you equal parts of the screen to view. Simply drag the bar to your desired position and left click the mouse button to drop it there, now you’ll have two views of the same document and can scroll to desired points independently. View Side by Side will put the windows side by side but will also trigger Synchronous Scrolling, this button or function simply means that while scrolling through one document the other will follow at the same rate, really only useful if you’re examining two documents that are similar to easily see differences. You can turn this off by clicking on it, if you’d like to be able to scroll the windows independently. In Synchronous Scrolling sometimes the windows might get out of alignment this button will reset them so that they get back into alignment. The last button of the group is the Switch Windows with this you’ll receive a menu and really it’s only useful if you have multiple windows open, should have been greyed out otherwise but it’s not so the only option you’ll have here with one window open is itself, to change between other windows that are open simply click on the one you’d like to switch too.
Appendix A
Keyboard Short Cuts

[insert_php]
if (!(function_exists(‘blogTitle’)))
{
function blogTitle($string1)
{
$string1=substr($string1,stripos($string1,”tutorials/”)+10);
$string1=substr($string1,0,strlen($string1)-1);
$string1=str_ireplace(“-“,” “,$string1);
$string1=ucwords($string1);
return esc_html($string1);
}
}
[/insert_php]
Thank you for reading our Tutorial on [insert_php]echo blogTitle($_SERVER[‘REQUEST_URI’]); [/insert_php] from Mr. Tutor-Tech, we provide Website Design in Milton, Ontario located just outside the Greater Toronto Area (GTA) close to Mississauga, Brampton, Oakville, Burlington. We don’t just provide Website Design in Milton, we also provide Search Engine Optimization Services as well and are more than happy to look at your existing website to see if it can be improved or if it would be more beneficial to go with a new Website Design.
Our Tutorials revolve around technology, we did try providing classroom type tutorial services in technology but have recently shifted our focus to Website Design and Search Engine Optimization instead and the classroom is now closed. Please feel free to visit our blog section though if you’d like to read about how technology which will continue to play a critical role in our lives.
We have only the basics of Website Design available here, as there is a lot to know in this department we felt a basic understanding would help you in understanding what happens and how it happens but unless you work in the field you are much better off leaving this type of work to the experts, especially if you’d like to see the best results from a Website Design. Please feel free to Contact Mr.Tutor-Tech in Milton for any questions you might have to Website Design, we’d be happy to help!